 to MicroPython: Arduino for Web Developers")
In late 2013, I received a SparkFun Inventor’s Kit as a non-denominational holiday present from a coworker. Without hyperbole, this was the best present I’ve ever received (thanks Anthony).
Before this, I knew nothing of electronics, hardware, or firmware. The SparkFun RedBoard (an Arduino Uno-compatible device) and its guidebook exposed to me the vast world of physical computing. Fascinated with the possibilities, I soon found myself a dedicated hobbyist.
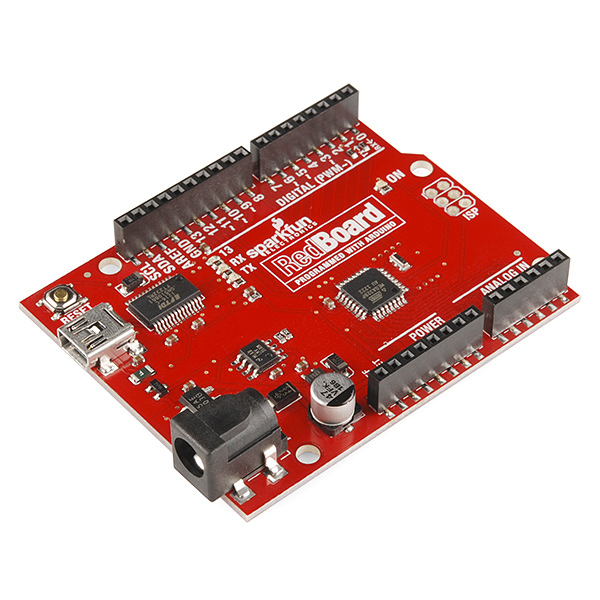 My introduction to hardware: The SparkFun RedBoard
As a “full stack” web developer by trade, my background is in higher-level languages—mainly JavaScript and Python. I was ripping out my luxuriant locks writing anything more than the most basic “sketch” in C/C++. Granted, the easy was easy. But it’s like putting lipstick on a pig. Just beneath the façade of digitalWrite and void loop is the seamy underbelly of C/C++, wallowing in its own filth. 🐷
Stepping out of my comfort zone into physical computing was more than enough of a challenge. I could certainly get by—since 2013, I’ve written more C/C++ than I had in the previous twelve years. And I realize a “close to the metal” language is often necessary for embedded systems. But it wasn’t fun.
What follows is the story of how this web developer started to have fun writing firmware. YMMV.
Programming an Arduino Using Johnny-Five & Node.js
In the name of “fun”, I sought out a higher-level language. I found NodeBots and Rick Waldron’s Johnny-Five project.
Opening a REPL w/ Johnny-Five and interacting with the hardware "live" was more than the Arduino IDE could offer (not saying much! zing!).
There's a catch, of course. J5 requires a serial connection or a board which can run Node.js natively. A tall order to be sure: this requires a supported OS and considerable memory resources. In other words, not an 8-bit MCU like the Uno’s ATmega328p.
A Linux-capable device satisfies requirements for many projects. For example, J5 is an excellent choice when working with GPIO on a Raspberry Pi or Tessel. It’s “just Node.js”—with excellent documentation and examples, right down to the Fritzing diagrams—and for anyone familiar with JavaScript, it’s trivial to learn (and not much more difficult to hack on).
Meanwhile, in the summer of ’14, while I was busy hacking on Johnny-Five, an unknown manufacturer out of Shanghai jumped into the pool with a tiny SoC—and it hit the water like a cannonball.
The ESP8266 Has Landed
This Hackaday post was the first introduction for many to the ESP-01 module, built with the ESP8266 MCU from Espressif. Its price point was—and still is—profoundly lower than any other WiFi-capable SoC.
Texas Instruments’ CC3000, introduced in 2013, was likely the lowest-cost module available at the time. It gained a reputation as an unreliable pest—and even today, you’re looking at nearly $40 USD for an obsolete eval board.
The ESP8266 threw the doors open for hobbyists to dabble in IoT and home automation. This thing is now everywhere. Better yet, the ESP8266 has since proven to be a highly reliable module.
Johnny-Five can drive an ESP8266 via WiFi (with some effort), but the device will still be tethered, and will fail if the connection is interrupted.
At first, it was a bit of a curiosity. In 2014, docs or educational resources in English were nearly nonexistent. We'd wire the ESP-01 module to an Arduino, and use it as a serial bridge over WiFi, using Hayes-like AT commands to control its behavior.
// example lifted from https://github.com/alokdhari/ESP8266

#include <SoftwareSerial.h>

SoftwareSerial mySerial(10, 11); // RX, TX

void setup() {
  // Open serial communications and wait for port to open:
  Serial.begin(9600);
  while (!Serial) {
    // busy wait!
  }


  Serial.println("Hello World");

  // set the data rate for the SoftwareSerial port
  mySerial.begin(9600);
  callWifiBoardWithCommand("AT", 1000);
  callWifiBoardWithCommand("AT+CWJAP=\"MY-SSID\",\"MY-PASSWORD\"", 5000);
  callWifiBoardWithCommand("AT+CIPSTATUS", 1000);
  callWifiBoardWithCommand("AT+CIPSTART=\"TCP\",\"www.bonesukll.com\",80", 4000);
  String cmd = "GET /index.html HTTP/1.1 Host: www.boneskull.com";

  callWifiBoardWithCommand("AT+CIPSEND=" + String(cmd.length()), 0);

  callWifiBoardWithCommand(cmd, 0);

  while(mySerial.available()){
    if(mySerial.find('O')){
      mySerial.println("+IPD");
    }
  }
}

void loop() { // run over and over
  if (mySerial.available()) {
    Serial.write(mySerial.read());
  }
  if (Serial.available()) {
    mySerial.write(Serial.read());
  }
}

void callWifiBoardWithCommand(String command, int waitFor)
{
  delay(1000);
  mySerial.println(command);
  delay(waitFor);
  while(mySerial.available()){
    Serial.write(mySerial.read());
  }
}
Good grief.
We knew the ESP8266’s hardware was certainly capable of use as a project’s main controller, but the software wasn’t yet ready.
Mercifully, we wouldn't have to wait long.
NodeMCU Makes Progress
Fast-forward some months (IIRC), and a native SDK appeared from Espressif. We started seeing the potential of the ESP8266, instead of just providing serial-over-WiFi to a micro.
This native SDK powered an ambitious project, NodeMCU. It drove the ESP8266 by way of Lua, a scripting language often found in moddable video games like WoW.
It had an associated development board (also confusingly called “NodeMCU”), which provided easy flashing via a USB port; before the NodeMCU board, ESP8266-based devices were all simple, breadboard-hostile modules:
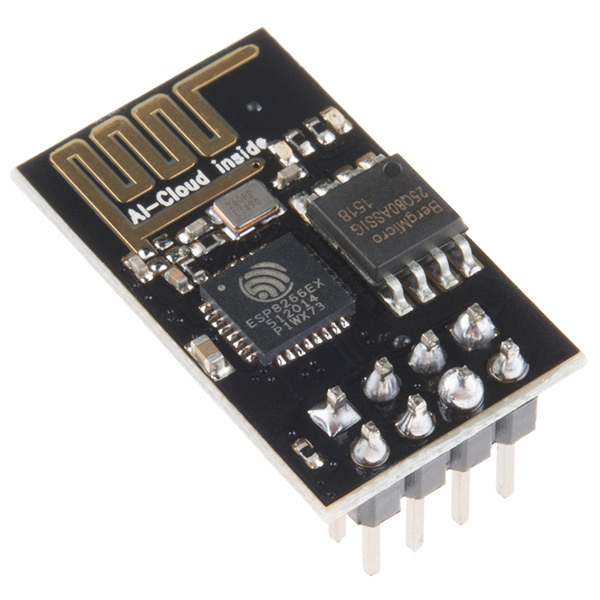 An ESP-01 needs a breadboard adapter, as the pins are all adjacent
They remained inhospitable even if you did manage to get them onto your breadboard:
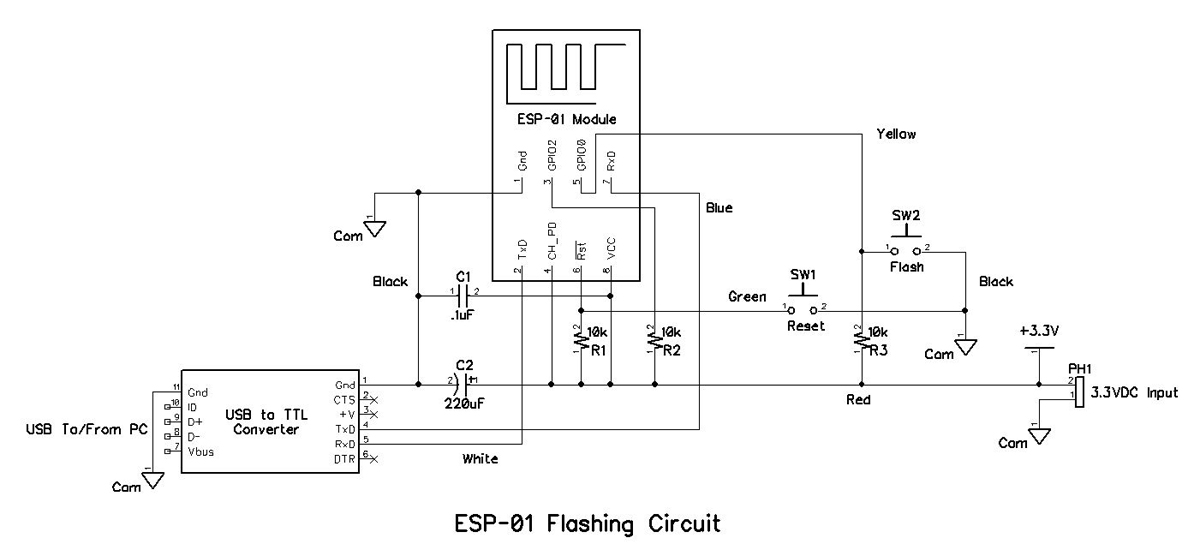 This circuit was really fiddly and tedious to flash
My early attempt at using an ESP-07 (and its adapter) to transmit temperature from an DS18B20 (datasheet) required considerable effort:
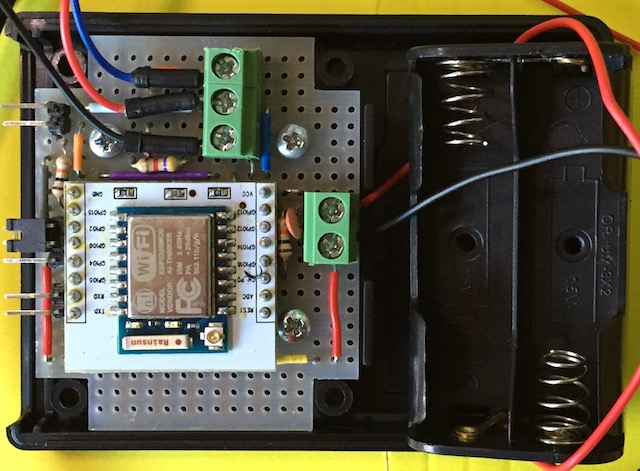 Four pins exposed for flashing & serial comms; the jumper switches flashing mode
The NodeMCU board, on the other hand, was a complete package:
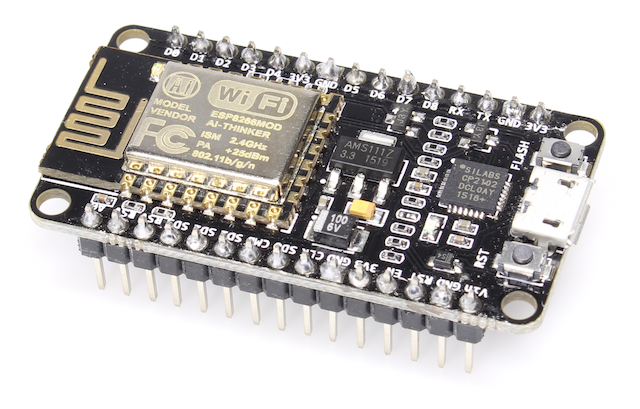 Note USB Micro-B receptacle, reset button, onboard passive components
While the NodeMCU board lives on in countless clones, contributions to NodeMCU-the-project waned. The community (and Espressif, which were wise to embrace open source) directed resources into the Arduino on ESP8266 project, which provided a familiar framework, and allowed firmware authors to leverage the existing Arduino ecosystem. Once this Arduino core became stable, many libraries “just worked” out-of-the-box, and those which didn't were easily ported via C preprocessor macros.
Lua isn’t a “bad” language by any means—just relatively obscure. I found the main drawback of the NodeMCU project was its small community; if the official project didn’t support a certain sensor or other component, you’d likely have to write that library yourself.
While the ESP8266 community buzzed, another project out of the UK slowly gathered momentum: MicroPython.
MicroPython Gets Crowdfunded
MicroPython is a Python 3 (-based) runtime designed for deployment on microcontrollers. Its genesis was a 2013 Kickstarter campaign featuring the PyBoard.
After the success of the original campaign (which eventually allowed its creator, Damien George, to work on MicroPython full-time), Mr. George launched another in early 2016, targeting our revered ESP8266. This well-timed campaign succeeded, despite the “reward” being little more than open-source software!
By the time it landed, many hackers already had ESP8266 boards in their clutches. Now that the first port of the framework was public, it was just a matter of time before the community extended MicroPython support to other platforms:
- Adafruit ported it to Atmel's ARM Cortex-M0+-based SAM D processors by way of a fork
- The Micro:bit Educational Foundation (presumably) ported to the BBC micro:bit, which runs Nordic's popular nRF51822 SoC for BLE
- Pretty much my favorite: PyCom helped develop a port for Espressif's newer SoC, the ESP32
- A few others I'm unfamiliar with (please comment if you've used them!)
MicroPython works well on ESP8266-based boards, as they are reasonably speedy at 80MHz. However, the ESP8266 has only 160KiB of SRAM, less 64KiB for the bootloader, less MicroPython's own overhead. You're really going to be squeezed here. Speaking from experience, it’s easy to run out of memory via object allocation, resources left open, or even too many lines of code—via import statements or otherwise!
While ESP8266-based dev boards are cheap and plentiful (a good one can be purchased direct from China for under $3 USD), for a few dollars more—under $7 USD—you can get your meathooks on an ESP32-based board.
This is important because the ESP32 runs MicroPython like a boss.
MicroPython Ported to the ESP32
The ESP32 isn’t a “successor” to the ESP8266; rather, it’s a step up: a SoC for more demanding applications.
From the chart below, you can see it's a far more capable device. But the big differentiator for us is the available RAM, which I've circled:
 It's all about the RAM.
This gives users of MicroPython much more flexibility--in fact, this is 320KiB more RAM than the PyBoard, which MicroPython was originally designed for!
In practice, this means you can stop worrying (as much) about how many modules you're import-ing, how many objects you're allocating, etc.
Is this overkill? Is this wasteful? Is it rad? Yes, yes, and yes.
As a library author, writing MicroPython for the ESP32 means you have the luxury of implementing better abstractions. Without the extra RAM to play with, low-level APIs and cut corners are the name of the game.
With the ESP32, hardware won’t be holding you back from using MicroPython. That said, MicroPython and its ecosystem has “quirks” that Pythonistas need to understand before digging in. I’ll cover a few below.
MicroPython Has Peculiarities
If you are hoping to pull random module off of PyPi and just import it, steel yourself for disappointment. I have yet to find non-trivial code written for Python 3 that “just works” in MicroPython. I ran into four (4) differences which were particularly problematic for Pythonic portability:
- MicroPython does not implement the entire Python standard library. For example, much of
sysdoesn’t make sense in the context. Metaprogramming tools liketypingsorabcdon’t exist. This doesn’t necessarily mean you can’t implement them yourself! - Of the standard library which it does implement, it wants to prefix those libraries with a
u(e.g.ujson). - You cannot chain exceptions in MicroPython. This means you cannot catch an exception and re-
raiseit as a different one. All you can do withtry/exceptis eat exceptions. - Subclassing builtins doesn’t always work the way you’d expect.
In addition, the ecosystem is immature. MicroPython lacks official guidelines and best practices for module authors. Installation of modules on devices involves manually copying files around. Fragmentation may become more of an issue due to various forks.
Better tooling and best practices will come in time, but we can still get things done and have fun doing it with MicroPython. I can’t wait to rewrite a bunch of my custom firmware with it. Not joking.
In my next post on the subject, I’ll walk through connecting a MicroPython-laden ESP32 to an MQTT broker. Just keep hitting refresh.